Showing posts with label GIS. Show all posts

Sunday 1 November 2020

How to Make Maps with ArcGIS Pro & Adobe Illustrator in 3 Steps (hint: AIX)


ArcGIS Maps for Adobe Creative Cloud

How to Make Maps with ArcGIS Pro & Adobe Illustrator in 3 Steps (hint: AIX)

ArcGIS Maps for Adobe Creative Cloud 2.2 is here! This post will show you how to take advantage of ArcGIS Pro’s new AIX file format for an efficient and user-friendly Adobe Illustrator map-designing experience. In addition to the AIX advantages, at the end of this post you will also learn how to use the new geospatially enabled AIX – available today with the new 2.2 release. Read “A Brief History…” below for more information on this new feature.

There are three Maps for Adobe account levels: complimentary (free), Plus, and the ArcGIS account holder. One of the many great things about this Pro-to-AIX workflow is that – if you are an ArcGIS Creator or GIS Professional user, you already have access to these featuresFor all of you mappers who want to explore this new feature, download the Maps for Adobe plug-in here.

A Brief History of Maps for Adobe

2015. In 2015, a few of us at Esri were conceptualizing a mapping plug-in for Illustrator. At this point in Maps for Adobe history, we had a nifty prototype that could pull data from ArcGIS Online into an Illustrator file.

May 2017. Version 1.0 is released! Since this release, Maps for Adobe users can build entire maps with Maps for Adobe inside Adobe Illustrator. Maps for Adobe continued to grow with subsequent updates, all the way to version 1.5.2, released March 3rd, 2020.

May 2020. Maps for Adobe 2.0 is released. Ok, this one is big. Its significance exists in details that are important to many mapmakers who, like me, enjoy using Adobe Illustrator for some of their maps’ aesthetic design. ArcGIS Pro users (v. 2.5 and later) can export an Adobe Illustrator Exchange (AIX) file, which can be opened with Maps for Adobe 2.0. Any ArcGIS Pro user with a Creator or GIS Professional license has access to both of these great mapping tools.

October 2020. Maps for Adobe introduces the geospatially enabled AIX file in version 2.2. This release combines Maps for Adobe version’s 1.x ability to create maps inside Illustrator with version 2.0’s ability to open an AIX file. What does this mean? Well, with this latest release, you will be able to open an AIX file in Illustrator and keep adding more data to that Illustrator file with Maps for Adobe. Super convenient!

What is an AIX file?

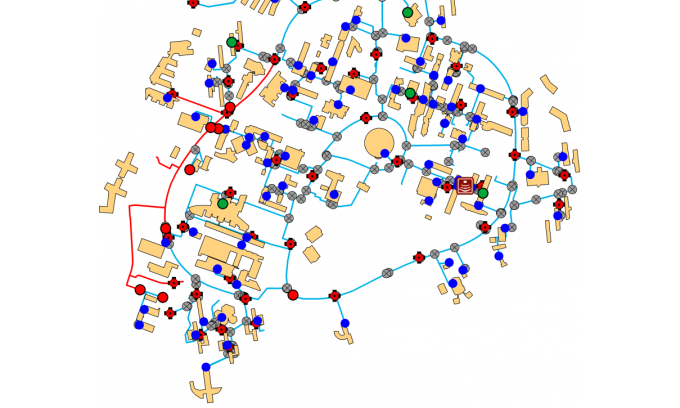
Prior to May 2020, ArcGIS Pro users typically exported a PDF if they wanted to open their map in Illustrator. A PDF export results in a set of editable vectors, however it does not maintain a map’s layer organization. For those mappers I keep mentioning – the ones who consider Illustrator an important part of their workflow – layer organization is essential to expedient design. ArcGIS Pro 2.5 and later gives the option to export an AIX, or Adobe Illustrator Exchange file. Maps for Adobe users can open the AIX file in Illustrator, which will be “unpackaged” as an impeccably organized AI file. The figures below illustrate a Pro project of a map that I will be referencing throughout this post’s demonstration.

ArcGIS Pro with thematic map layout of post office points and county polygons
Layer details for Pro-to-AIX demo

More than 50,000 individual map features

  • I have a map layout set up for a typical thematic map of the US: a separate map frame for Alaska, Hawaii, and the mainland 48 states.
  • Each map frame in this layout has the following layers:
      • USA post offices (more than 32,000 points)
      • FedEx Facilities (~9,500 points – *the self-serve FedEx boxes were removed from this dataset)
      • Five separate USA counties layers, each symbolized by a different theme:
          1. Population Density
          2. Post offices per capita
          3. FedEx facilities* per capita
          4. Total post offices
          5. Total FedEx facilities*
  • A USA States layer

32,000+ Post Office points, ~9,500 FedEx points, and (5×3,141)=15,705 counties is more than 50,000 individual features.

By exporting this layout as a PDF, I would get one single layer in Illustrator with over 50,000 pieces of “artwork” without any identifying layer structure. Imagine trying to scroll through 50,000 paths (image below) just to find the counties of a specific data range for Post Offices Per Capita. The image shows the first few paths of the more-than-50,000 in a PDF export opened in Adobe Illustrator. It would take a full day to organize this export prior to styling it with efficiency. This is why you should use the AIX export option.

Example of unorganized layer structure in PDF export from Pro (opened in Illustrator)

Authoring a map for AIX export

There are a few things to consider when setting up an ArcGIS Pro map before sharing it as an AIX. As this feature continues grow, these considerations will change, so keep checking the product’s doc page for updates. In fact, because the AIX option is so new, the product engineers want YOU to help them make it the best for your workflow. They even made this survey for you, so that you can help influence this feature’s evolution.

Step 1 – Setting up the map in ArcGIS Pro to share as an AIX file

The Layers

I decided to create a thematic map series about U.S. Post Offices for this demo. But really, this workflow could work on any map style. In Pro, once you’ve set up your layout with all the analyses and features that you want to include, make sure the layers are visible. See the Maps for Adobe doc for more information on the Pro-to-AIX setup.

Step 2 – Share the layout as an AIX file format

When your map is ready in Pro, click the Share tab and then select “Layout” if you’re sharing the layout as an AIX, which is what I did for this map. (If you were sharing from a map tab, you would select share –> map).Make sure you’re selecting the export option of Layout, and not the print option:

Pro's share tab with layout export highlighted

Select AIX as the file format in the dialog. To add new data to the geo-spatially enabled file in Illustrator, be sure to uncheck “clip to graphics extent” to retain the coordination:

Pro share dialog settings for AIX export
To add new data to the geo-spatially enabled file in Illustrator, be sure to uncheck "clip to graphics extent" to retain the coordination.

Step 3 – Sign in to Maps for Adobe to open your AIX file

With Maps for Adobe 2.2 installed, open Adobe Illustrator, and sign in to Maps for Adobe using your ArcGIS organizational or Creator account. To open an extension in Adobe Illustrator, just go to the Windows menu, where you will then select “Extensions –> ArcGIS Maps for Adobe Creative Cloud. Once you are signed into Maps for Adobe, you can open your AIX file as an organized structured ready-to-design Illustrator file.


Selecting Extensions from Illustrator Windows menu to find the mapping plugin

The AIX layer structure in Illustrator

Parent Layers


Parent layer organization structure in Adobe Illustrator when opening an AIX file

The image above shows the Illustrator file’s layer structure from the Pro project:

  • A parent layer for the legend, containing all the artwork making up the legend.
  • Parent layers for each map frame’s labels.
  • Parent layers for each map frame (Hawaii, Alaska, and the Lower 48 mainland states)

Sublayers

By expanding the Lower 48 parent layer, you can see the beautifully organized structure of each thematic map layer that I had in my Pro project.

Each map layer from pro is a sublayer in Illustrator, containing all the features for that layer.

Classed category layers in Illustrator

For each layer that was symbolized by a particular class or categorized system, there will be a sublayer for each category. For example, in the image below, there is a sublayer for all the category ranges for Post Offices Per Capita. This means that I can easily select only the counties that I want and give them their own unique style in Illustrator. As you can imagine, this ready-to-go structure saves mapmakers a lot of time.


Each data category as an individual sublayer for easy selection in Adobe Illustrator

Geospatial AIX

As you will recall, I told you at the beginning of this post that our 2.2 release has the new geospatially enabled AIX feature. By using my ArcGIS Pro project, let’s take a look at what this means for Maps for Adobe users.

Map frames load as Mapboards

For those of you who have made a map with the traditional Maps for Adobe (making a map directly in Illustrator), you know the three basic steps:

  1. The Mapboard panel is the space where you create your map’s extent, which is called a mapboard.
  2. Once you create a mapboard, you can add layers to the mapboard in the Compilation panel.
  3. After all desired layers, labels, and geoanalyses are added, the mapboard can be downloaded as an AI file from the Compilation panel.

Now, when you open an AIX file in Illustrator, Maps for Adobe will automatically load each map frame from your ArcGIS Pro project as a mapboard in the Mapboards panel. The image below shows the Mapboards panel centered on my Lower 48 mapboard, and the dropdown illustrates each of the three mapboards that loaded when opening the AIX file. That is to say, my Lower 48, Hawaii, and Alaska map frames from my ArcGIS Pro project each have a respective mapboard. What does this mean? Well, now with my map opened in Illustrator, I can add even more layers!

Mapboard panel with the mainland USA selected as active map

Add new layers to your AIX-generated AI file

When you open the AIX file, an AI file is created that is automatically synced to Maps for Adobe, as described above. With this link, you can search ArcGIS Online, including Living Atlas and your own personal organization, for additional web maps and layers to add to your AI file. You can also sync local data to the AI file. In the image below, I am adding state boundaries from my ArcGIS organization to my Lower 48 mapboard. After adding the states layer to the mapboard, I click the sync button to add the layer to my Illustrator file. You can view some of the final Post Office maps that I made with this workflow at the end of this post.

If you want to help the product engineers grow this new AIX capability, be sure to check out their survey they made with mapmakers like you in mind.

Adding new data from ArcGIS Online to the mapboard
Point map of usa post office locations
Post offices per 10,000 people

Additionally, at this month’s North American Cartographic Information Society (NACIS) annual conference, I presented the ArcGIS Maps for Adobe Creative Cloud 2.2 release (Maps for Adobe). NACIS is a 40-year-strong community of map enthusiasts who meet once a year to share and learn about cartography projects.

ABOUT THE AUTHOR

Datavisualization & mapping. When I'm not doing that, I'm rock climbing, running, and enjoying the outdoors. I post some of my work on my site, sarahbellmaps.com

CONNECT:    
Sign In to leave a comment.

Leave a Reply

 newest  oldest
Brian E
Brian E

I have map with Human Geography Dark, rotated at 29 degrees, and does not open correctly in Illustrator

NEXT ARTICLE

How to make a full-on vintage scalebar in ArcGIS Pro

Read this article 

Friday 1 May 2020

Use of GIS in Smart City Projects

Use of GIS in Smart City Projects - 04/10/2018

Managing and Visualising Geospatial Data in a User-friendly Environment


The smart city concept is developing very quickly around the world, because it provides a comprehensive digital environment that improves the efficiency and security of urban systems and reinforces the involvement of citizens in urban development. This concept is based on the use of geospatial data concerning the urban built environment, the natural environment and urban services. The successful implementation of a smart city project requires the development of a digital system that can manage and visualise the geospatial data in a user-friendly environment. The geographic information system (GIS) offers advanced and user-friendly capabilities for smart city projects. This article shows how a GIS could help in the implementation of smart city projects and describes its use in the construction of a large-scale model of the smart city.
The ‘smart city’ concept aims at developing a comprehensive system that uses geospatial data to enhance the understanding of complex urban systems and to improve the efficiency and security of these systems. This geospatial data concerns (i) the urban built environment such as infrastructure, buildings and public spaces, (ii) the natural environment such as biodiversity, green spaces, air quality, soil and water, and (iii) urban services such as transport, municipal waste, water, energy, health and education. The smart city concept also aims at transforming the ‘silo-based’ management of cities into a ‘shared’ system that involves urban stakeholders in the design, realisation and evaluation of urban projects.

Figure 1: Steps for the implementation of smart city projects.

The emergent technology enables cities to achieve more agile management that improves the quality of life for citizens, enhances the economic development, improves the attractiveness of the city and reinforces the involvement of citizens in the city government. Indeed, the smart city concept provides the city managers with pertinent information about the performance of urban infrastructure and services, as well as users’ feedback. Analysis of this data allows policymakers and city managers to improve the efficiency of the urban system as well as the quality of urban services. This concept is particularly pertinent for the security and resilience of the city. It allows collection of data concerning how the city infrastructure and stakeholders respond to urban hazards. Analysis of this data provides greater understanding of the behaviour of urban systems (infrastructure, public services, emergency response, etc.) during urban crises or disasters, and consequently enables improvements to the city’s capacity to address the resiliency challenges. The smart city concept offers the possibility to confine a local fault and to prevent its spread to larger areas.

Use of GIS in smart city projects

The implementation of smart city projects is based on a number of steps (Figure 1) including the construction of the urban digital model, data collection using the sensing layer, then data analysis, interactive data visualisation and system control. GIS plays a role in these steps, as described below.

Construction of the urban digital model

The first step in the implementation of smart city projects concerns the construction of the urban digital model that describes the components of the urban built and natural environments. For each urban component, the digital model provides the geolocalisation and characteristics (attributes). GIS is generally used for the construction of the digital model of urban ‘horizontal components’ such as urban networks, transport facilities and natural environment, while building information modelling (BIM) is used for the description of ‘vertical components’ such as buildings. The combination of GIS and BIM provides a powerful tool for the construction of the urban digital model with georeferenced data and the visualisation of this data in a user-friendly environment.

Figure 2: Sensors used in water and energy utilities monitoring.

Sensing layer

The second step in smart city projects concerns the construction of the sensing layer that transfers urban operating data to the smart city information system. This layer includes sensors used for monitoring urban networks and infrastructures. Data could also be enhanced by images, videos and audio files resulting in the construction of urban big data. Figure 2 shows examples of sensors used in monitoring water and energy utilities. The drinking water system uses automatic meter readers (AMRs) to record water consumption, pressure sensors to record water pressure and water quality devices to track the water quality (turbidity, pH, chlorine, conductivity). The drainage system uses sensors to monitor the water level and flow, water quality (turbidity, temperature, pH, etc.) and pumping equipment. It allows early detection of flood and faults in pumping equipment. The electrical grid uses sensors to measure the electrical tension, current and frequency. It allows early detection of faults in the electrical grid. The district heating system is monitored by sensors to record fluid temperature, pressure and flow as well as the state of the valve. It allows early fault detection and the improvement of the system performance. GIS offers the possibility to visualise the monitoring system as well as the sensors’ characteristics and status. It also provides the possibility to visualise real-time and historical data on GIS maps.

Figure 3: GIS system of the electrical grid (red: high-tension line, blue: low-tension line)

Data analysis

The third step in implementing a smart city project concerns the development of the analytic environment, which converts real-time and historical data into operational data that improves the security, efficiency and quality of urban systems. The analytic environment includes engineering, management and safety software for urban systems as well as advanced digital tools such as artificial intelligence (AI). In smart city projects, GIS provides tools for (i) geospatial data analysis (distance and directional analysis, geometrical processing, grid models), (ii) spatiotemporal analysis, (iii) spatial statistics (spatial autocorrelation and egression), (iv) surface analysis (surface form and flow analysis, gridding and interpolation methods) and, (v) location analysis (shortest path calculation, facility location).

Interactive data visualisation

Interactive data visualisation allows users to interact with the smart city’s components and the stakeholders in a user-friendly environment. Web applications are used to create this interactive environment. The use of HTML popups enables users to access web-based content such as graphics referenced by URLs. The interactive GIS graphic environment allows the visualisation of urban components and sensors maps. Users and managers can utilise these maps to access static and dynamic data concerning urban systems as well as to update the data.

Figure 4: Use of GIS to visualise the equipment of the storm-water system in the SunRise project.

Control layer

Data analysis of historical and real-time data results in commands for the optimal and safe management of urban systems. These commands are transmitted to the control layer, which includes different electronic devices such as smart valves, pumps, motors, switches, breakers and locks. The GIS system allows real-time visualisation of these devices as well as their status. It could also visualise faults in device command.

SunRise smart city project

The SunRise smart city project was aimed at the construction of a large-scale model of the smart city at Lille University’s scientific campus. The campus is equivalent to a small town, with 145 buildings, about 25,000 users and 100km of urban utilities.
The first step of the SunRise project included the collection of asset data about the campus utilities and integration in the SunRise GIS system. The data concerned linear components such as pipes and lines and their attributes (diameter, material, age, etc.) as well as utilities-related equipment such as valves, hydrants, pumps, substations, manholes and tanks. Figure 3 shows the use of GIS for the electrical grid of the campus. The GIS map provides the grid architecture as well as attributes of the grid components including the electrical lines and substations. Figure 4 shows the GIS map of the storm-water system and the relevant equipment (valves, flow regulator, retention tank and lifting station).

Figure 5: Use of GIS to visualise the maintenance of the sanitation system in the SunRise project.

The SunRise GIS system also included inspection and maintenance data. Figure 5 shows images of the video inspection of the sanitation system. For each component of this system, the management team can gain access to the maintenance history and reports including images and videos. The team can also conduct geospatial analysis of maintenance data for the optimisation of renovation and maintenance costs.
The monitoring system was also integrated in the SunRise GIS system. Figure 6 shows the smart monitoring of the drinking water network. It includes automatic reading meters (AMRs) for the water supply and consumption as well as pressure meters. The team manager can directly access information about the sensors and visualise the consumption history. The team can also compare the consumption of buildings and use data analysis to show abnormal consumption levels.

Conclusion

This article has presented the use of the GIS in the implementation of smart city projects. Since smart city projects are based on the collection, analysis, sharing and visualisation of data concerning urban systems and services, GIS provides powerful capacities for a successful implementation of such projects. GIS allows smart city managers to utilise a user-friendly and widely used digital system in the management of urban systems. GIS was used in the construction of the SunRise smart city demonstrator at the Lille University campus. The use of GIS facilitated effective cooperation between around 20 young researchers and the campus team management. GIS was used to store, share and analyse data concerning the campus utilities as well as their maintenance and monitoring.
Acknowledgement
The author would like to thank Nitivat Voraditee from Lille University for his contribution to this article.

Figure 6: Use of GIS to visualise the monitoring system of the drinking water network in the SunRise project.

Last updated: 05/03/2020

Friday 4 October 2019

A Collection of Free GIS Related Books

A Collection of Free GIS Related Books:

Map projections: A working manual:
https://pubs.er.usgs.gov/publication/pp1395

GIS in Sustainable Urban Planning and Management : A Global Perspective:
http://oapen.org/search?identifier=1002491

GIS for Public Safety:
https://docs.google.com/forms/d/e/1FAIpQLScIjjlbY5P8ekedECt5T8eUlnvYStLVvD_3baZjWrbVixMUyA/viewform?formkey=dHBNY1JkUGt1T0U0Qy1wTkdMOGZqQnc6MA

Essentials of Geographic Information Systems:
https://resources.saylor.org/wwwresources/archived/site/textbooks/Essentials%20of%20Geographic%20Information%20Systems.pdf

Python Scripting for Spatial Data Processing:
https://chris35wills.github.io/papers/python_scripting_for_spatial_data_processing.pdf

Cartography - A Tool for Spatial Analysis ( Carlos Bateira) :
https://www.intechopen.com/books/cartography-a-tool-for-spatial-analysis

Nature of Geographic Information:
https://opentextbc.ca/natureofgeographicinformation/

GIS Commons: An Introductory Textbook on Geographic Information Systems:
https://giscommons.org

Application of Geographic Information Systems:
https://www.intechopen.com/books/application-of-geographic-information-systems

Google Maps API Succinctly:
https://www.syncfusion.com/ebooks/google_maps_api_succinctly

Geospatial Analysis 6th Edition, 2018:
http://www.spatialanalysisonline.com/HTML/index.html

Principles of Geographic Information Systems (GIS): an Introductory Textbook:
https://webapps.itc.utwente.nl/librarywww/papers_2009/general/PrinciplesGIS.pdf

Map projections: A working manual:
https://pubs.er.usgs.gov/publication/pp1395

Satellite Positioning:
https://www.intechopen.com/books/satellite-positioning-methods-models-and-applications

Global Navigation Satellite Systems:
https://www.intechopen.com/books/global-navigation-satellite-systems-signal-theory-and-applications

Google Maps API Tutorial:
http://econym.org.uk/gmap/

Principles of the Global Positioning System:
https://ocw.mit.edu/courses/earth-atmospheric-and-planetary-sciences/12-540-principles-of-the-global-positioning-system-spring-2012/#

Map Scripting 101: An Example-Driven Guide to Building Interactive Maps:
https://books.google.com.bd/books?id=qAHb_Zn9MWsC&printsec=frontcover&redir_esc=y#v=onepage&q&f=false

ArcGIS books::

The ArcGIS Imagery Book:
https://learn.arcgis.com/en/arcgis-imagery-book/#home-overview

The ArcGIS book; 10 big ideas about applying the science of where:
https://learn.arcgis.com/en/arcgis-book/#home-overview

Essays on Geography and GIS:
https://www.esri.com/~/media/Files/Pdfs/library/bestpractices/essays-on-geography-gis-vol7.pdf

Managing GIS 3:
https://www.esri.com/~/media/Files/Pdfs/library/ebooks/managing-gis-3.pdf

GeoLearning:
https://www.gisday.com/content/dam/esrisites/en-us/about/events/gis-day/geolearning.pdf

Crossing Borders:
https://www.gisday.com/content/dam/esrisites/en-us/about/events/gis-day/crossing-borders.pdf

Enterprise GIS:
https://www.esri.com/~/media/Files/Pdfs/library/ebooks/enterprise-gis.pdf

Return on Investment:
https://www.esri.com/~/media/Files/Pdfs/library/ebooks/return-on-investment.pdf

Geodesign: Past, Present, and Future:
https://www.esri.com/~/media/Files/Pdfs/library/ebooks/geodesign-past-present-future.pdf

ArcGIS Online in Education:
https://www.esri.com/~/media/Files/Pdfs/library/ebooks/arcgis-online-in-education.pdf

Geodesign in Practice: Designing a Better World:
https://www.esri.com/~/media/Files/Pdfs/library/ebooks/geodesign-in-practice.pdf

Farming the Future August 2013 cover photography courtesy of Derek Tickner GIS for Agriculture, Vol 2:
https://www.esri.com/~/media/Files/Pdfs/library/ebooks/farming-the-future.pdf

New Eyes on the Old World:
https://www.esri.com/~/media/Files/Pdfs/library/ebooks/new-eyes-on-the-old-world.pdf

Geomedicine:
https://www.esri.com/library/ebooks/geomedicine.pdf

125 Years of Topographic Mapping at USGS:
https://www.esri.com/~/media/Files/Pdfs/library/bestpractices/125-years-of-topo-mapping.pdf

GIS is a Green Technology:
https://www.esri.com/~/media/Files/Pdfs/library/bestpractices/gis-is-green.pdf

What is GIS:
https://www.esri.com/~/media/Files/Pdfs/library/bestpractices/what-is-gis.pdf

Using GIS with GPS:
https://www.esri.com/~/media/Files/Pdfs/library/bestpractices/using-gis-with-gps.pdf

The New Geographers:
https://www.esri.com/~/media/Files/Pdfs/library/ebooks/new-geographers.pdf,

Sunday 8 September 2019

CALCULATING VOLUME WITH SURFER SOFTWARE

CALCULATING VOLUME WITH SURFER SOFTWARE
        
1. Launch your Surfer software.                              2. Goto Grid, Select Data, select the folder where u saved your XYZ data which maybe in Excel format and press open.

A grid report pops out which u can view and then select 🆗 and save your grid report to the folder so desired.  
              
3. Goto Grid again, select Volume, select the grid report file u saved before and open.

A grid volume dialogue pops out,  select the Z constant and the Scale constant and press 🆗.                                       

4. Your Grid Volume Computation report displays showing you the volume using different methods like
(a).  Trapezoidal Rule
(b)  Simpson's Rule and (3) Simpson's 3/8 Rule.
It equally shows you the Cut and Fill area

Wednesday 21 August 2019

FUSING IN CAD CAPABILITIES INTO GIS. BY HONEST S. O. U.

FUSING IN CAD CAPABILITIES INTO GIS.       BY HONEST S. O. U.              

ArcGIS as a GIS software lacks some cartographic capabilities for drafting of work. We are often left with converting/ exporting our GIS work into a CAD environment and after some modifications in CAD environment, the work is exported back to ArcGIS environment. GIS lacks some conventional cartographic signs and symbols and does not allow free sketching of such signs/ symbols, a times we make do with Adobe Illustrator and other softwares to aid us.        The question therefore is,  how can we fuse in CAD capabilities into GIS environment?  I found out a simple method of doing this. You can convert your shape file to CAD file. Without closing the ArcGIs, open the CAD file and do the necessary modifications on the CAD  work. Use layer plotting for all text files, signs and symbols so that they can come out as layers in ArcGIS. After all the modifications both the layout and adjustments in the digitized features (Point, Line and Polygon) .Save your CAD work and open your ArcGIS file which u minimized and you will find all the modifications on your ArcGIS.                      Cheers.

STEPS FOR CONVERTING YOUR ArcGIS SHAPE FILE TO CAD.                                    1.Goto ArcToolbox.                     
2.Select Conversion Tools.                                     3.Select to CAD. Select ,Export to CAD.           Under Input Features, (select the shape files you want to convert). Under Output Type( select the DWG- the AutoCAD version u want to save it),  Under output file(Select the folder you want to save it).                                           4. Select Ok and wait for the files to convert/export to CAD. When its successful, it pops out successful message on the ArcGIS environment

History and Life... Wike: Stop Watering Your 2023 Ambition With the Blood of Igbo Youths 😭😭

Wike: Stop Watering Your 2023 Ambition With the Blood of Igbo Youths 😭😭 By Chidiebere Nwobodo  I am not a fan of Nnamdi Kanu n...